Hello! In the US, at least, it's been a rather unpleasant year due to all the election rhetoric we've had to endure. But I know people in other countries have had their share of problems too. It's been a challenging time for so many, for so many reasons.
What to do? It may sound simplistic, but at times like these I like to spread a little kindness around where and when I can. Occasionally I'll do something like stick a dollar bill where it will discovered by someone else, but more often I'll leave something that I hope people will still enjoy finding - an item I've made that has an uplifting message.
I'm deliberately being vague with what I make to leave around for others to pick up, since part of the fun is others not knowing who left the item. (I sometimes leave things around the town where I live). I do stick with things that are portable so that I can take them along with traveling. Thus, I distributed my bits of creative inspiration on a summer road trip from Denver to West Michigan, and more recently did so from West Michigan to New York and back.
And in my previous post, I mentioned that we'd been "booed" by a neighbor in the form of some Halloween treats. Each household that has been thus gifted is supposed to hang a sign in their window, and so as it gets closer to October 31st, it's fun to see the spirit of the holiday going from block to block. I don't know who started this "booing" in our neighborhood, but it was a kindness begun by someone.
Of course, there are so many ways to spread kindnesses; I've just mentioned a couple of small examples that I've done lately. If you'd like to focus on spreading kindnesses where and when you can, just do what works for you!
Wednesday, October 26, 2016
Saturday, October 22, 2016
Eats: Homemade Caramel Corn
When I make the same recipe twice in three days, you know it has to be good! And such is the case with a homemade caramel corn recipe.
A couple of days ago, we were "booed" by a neighbor: we became recipients of some Halloween goodies, with instructions to "boo" two more neighbors in turn by secretly dropping off some goodies for them.
I immediately thought of a caramel corn recipe I'd printed from the King Arthur Flour website a few years ago. The recipe had gotten rave reviews from commenters, but I couldn't remember if I'd tried it out for myself. But no time like the present, so I made two half recipes via the microwave. Each half recipe yielded about 8 ounces.
Then we got word that a relative may be stopping by this evening. Since this relative has several kids, I decided to make the caramel corn again, only this time using the full-recipe instructions that call for oven baking. And of course, the full recipe equals one pound.
Even with making two half recipes, the microwave version is much quicker than the oven version: between 5-6 minutes per microwave batch, versus a full hour of oven cooking (very little hands-on time, though; just a good stir every 15 minutes).
But I have to admit, the oven caramel corn turned out better. Even though I'm sure you know what caramel corn looks like, here's how it turned out:
If you'd like to make some yourself, go here.
This link is for the oven version; the microwave technique was courtesy of a commenter. To save you from having to wade through all those comments, here's how to make the caramel corn that way:
Microwave Version of Carol's Caramel Corn
7 1/2 cups popped popcorn
1 tablespoon molasses (see note below)
1/2 cup brown sugar
1/4 cup (1/2 stick) salted butter (see note below)
2 tablespoons corn syrup
1/4 teaspoon baking soda
Place popped corn in large microwave-proof bowl (I recommend greasing bowl first for easier clean-up later. And since my microwave is large enough, I used a 9x13 glass dish, figuring it'd be easier to evenly coat the popcorn than in a bowl).
Place molasses, brown sugar, butter and corn syrup in medium microwave-proof bowl (again, I recommend greasing the bowl first). Cook on high one minute, stir, then cook 2 minutes more. Add the 1/4 teaspoon baking soda, mix in, then pour syrup over popped corn. Stir, then cook 2-3 minutes, stirring every 30 seconds. Spread out onto waxed paper to cool.
Notes: a commenter had suggested using half honey, half molasses in the recipe (so in the case of the above half recipe, 1 1/2 teaspoons each). I have dark molasses on hand, so decided to try that suggestion. Worked great; I would not have wanted the stronger molasses taste that the full amount would have created. But if you love dark molasses - or have the light kind on hand - feel free to add that one tablespoon.
I had unsalted butter, so I added a few sprinkles of salt right after pouring the cooked syrup over the popped corn, then mixed the salt in while stirring the syrup evenly onto the corn.
Some commenters said they had added nuts to the mixture. For this half recipe, King Arthur recommended 1/2 cup roasted, salted peanuts, adding them along with the popped corn before making the syrup. I'm sure that other nuts could be used as well; I suspect they suggested peanuts to create a "Cracker Jack" effect.
This stuff is seriously good! I'm half-hoping the relative won't show up tonight - then I can have the caramel corn all for myself!
But then again, even if he does show up and claims this treat, our daughter is coming home next weekend, so I can make another batch and share it with her. That would work!
A couple of days ago, we were "booed" by a neighbor: we became recipients of some Halloween goodies, with instructions to "boo" two more neighbors in turn by secretly dropping off some goodies for them.
I immediately thought of a caramel corn recipe I'd printed from the King Arthur Flour website a few years ago. The recipe had gotten rave reviews from commenters, but I couldn't remember if I'd tried it out for myself. But no time like the present, so I made two half recipes via the microwave. Each half recipe yielded about 8 ounces.
Then we got word that a relative may be stopping by this evening. Since this relative has several kids, I decided to make the caramel corn again, only this time using the full-recipe instructions that call for oven baking. And of course, the full recipe equals one pound.
Even with making two half recipes, the microwave version is much quicker than the oven version: between 5-6 minutes per microwave batch, versus a full hour of oven cooking (very little hands-on time, though; just a good stir every 15 minutes).
But I have to admit, the oven caramel corn turned out better. Even though I'm sure you know what caramel corn looks like, here's how it turned out:
 al
alThis link is for the oven version; the microwave technique was courtesy of a commenter. To save you from having to wade through all those comments, here's how to make the caramel corn that way:
Microwave Version of Carol's Caramel Corn
7 1/2 cups popped popcorn
1 tablespoon molasses (see note below)
1/2 cup brown sugar
1/4 cup (1/2 stick) salted butter (see note below)
2 tablespoons corn syrup
1/4 teaspoon baking soda
Place popped corn in large microwave-proof bowl (I recommend greasing bowl first for easier clean-up later. And since my microwave is large enough, I used a 9x13 glass dish, figuring it'd be easier to evenly coat the popcorn than in a bowl).
Place molasses, brown sugar, butter and corn syrup in medium microwave-proof bowl (again, I recommend greasing the bowl first). Cook on high one minute, stir, then cook 2 minutes more. Add the 1/4 teaspoon baking soda, mix in, then pour syrup over popped corn. Stir, then cook 2-3 minutes, stirring every 30 seconds. Spread out onto waxed paper to cool.
Notes: a commenter had suggested using half honey, half molasses in the recipe (so in the case of the above half recipe, 1 1/2 teaspoons each). I have dark molasses on hand, so decided to try that suggestion. Worked great; I would not have wanted the stronger molasses taste that the full amount would have created. But if you love dark molasses - or have the light kind on hand - feel free to add that one tablespoon.
I had unsalted butter, so I added a few sprinkles of salt right after pouring the cooked syrup over the popped corn, then mixed the salt in while stirring the syrup evenly onto the corn.
Some commenters said they had added nuts to the mixture. For this half recipe, King Arthur recommended 1/2 cup roasted, salted peanuts, adding them along with the popped corn before making the syrup. I'm sure that other nuts could be used as well; I suspect they suggested peanuts to create a "Cracker Jack" effect.
This stuff is seriously good! I'm half-hoping the relative won't show up tonight - then I can have the caramel corn all for myself!
But then again, even if he does show up and claims this treat, our daughter is coming home next weekend, so I can make another batch and share it with her. That would work!
Sunday, October 16, 2016
Thrifty Acres: Rummage Sales Don't Fail!
Hello! I love rummage sales, so even though we were leaving for an out-of-town trip last weekend, I made time to check out a church rummage sale a few hours before our departure. (It helped that the church is but a short drive from our house).
As a rule, rummage sales don't fail, especially the ones run by churches. Devoted congregants are usually happy to donate their unwanted items, and the results are tables laden with kitchenware, holiday decorations, vintage goodies and more. (there wasn't clothing offered at this particular sale).
I came back from the rummage sale quite pleased with what I'd found. Only bought one kitchen item, but craft supplies and vintage finds (often a combination of both, as you'll soon see) were plentiful.
Show and Tell Time!
 Primitive-style pig cookie cutter. I don't know if this was handmade, but I thought it was cute.
 Portion of a craft kit produced by TBC (stands for The Best Choice). Not sure of the age of this but it's vintage. This is part of a 36"x36" cloth, with a different holiday scene on each of the four corners. The above photo shows a stamped scene of Santa going down a chimney, with two skeins of Nun's Boilproof Flochelle (a type of embroidery floss).
So you'd think this Santa scene is meant to be embroidered, yes? No, as a finished corner shows:
 Each scene is meant to be appliqued, and an unknown crafter had done a nice job on these bells. A scene of holly sprigs was also done, and a Christmas tree with candles was 3/4 completed.
The set also came with four 12" napkins:

 These are the two stamped designs, repeated for the other two napkins. Too bad my mother has already passed away - if she was still alive, I would have gladly stitched these up and given them to her as a present. She didn't do much needlework herself but loved vintage examples of it. And these designs are printed on high-quality linen. Sure, I could stitch them up myself - the embroidery is easy - but then I'd probably think they're too nice to use!
More vintage:
 A children's ABC card set, back when tv's looked like this:
 A television, circa 1959.
For a dollar, I got a pile of 1970's to early 1980'd craft leaflets and craft kits, starting with:
 From the cover of Macrame Forms And Figures (by Lynn Tucker, 1975), clown, a Santa and a witch. Ugh!
Somewhat better is this:
 From Easy To Make Macrame Pot Hangers (by Caren Greenwood, 1974), the "Texas Topaz" pot hanger.
 Pot hangers not your thing? Then why not make the elephant wall hanging, from Macrame Animal Art (Susan Shwartz, 1976)? All you need is 130 yards of gray yarn! Wow, wonder how long it took to make that thing?
In case you're curious, no, I never learned how to do macrame. However, I've started to see online pics of millennial types who've made macrame projects that look quite nice. I think that typically they've used some sort of natural cotton roping or cording, which gives their wall hangings and pot hangers a pleasing organic look. So who knows, maybe I'll try my hand at a 21st Century version of "Texas Topaz" sometime.
But I'd be more likely to first try some projects from this leaflet, also in the bundle:
 Pom Pom Parade (1977, Eleanor Zimmerman). I bought a pom pom making set at Target earlier this year and have dabbled with it. There's some cute, relatively quick projects in this leaflet:
 Goldilocks and the Three Bears, in finger puppet form.

 For the holidays, an elf and Santa.
For next year's tulip festival:
 A Dutch girl, and look - even her tulips are made from tiny pom poms! (Dress, apron, hair ribbons and hat are made from felt, as far the tulip stems and leaves). Pretty cute!
(Not everything in the bundle is photo-worthy, such as the two drab candlewicking pillow kits. Maybe a clever millennial will revive that craft sometime too!)
Another vintage purchase:

A grouping of six vintage children's clothes hangers. Liked the colors and the animal depictions:
 Super cute!
But one of my favorite finds wasn't vintage - rather, it was a shoebox-sized plastic storage tub filled with rubber stamping supplies, some of which had never been used.
 Three sets of clear stamps. The set in the center is still in its original packaging. Even discounted, it retails for over six dollars at Amazon.
Handy words and phrases:

 A nice collection to use on greetings cards, to add interest to collages, etc.
I loved the image in this self-inking stamp, also in the same storage tub:
 The numbers "11303" don't show up in the stamped image; I'm guessing that's a stock code. This stamp is a little beat up, so it's probably been around awhile, but still stamps up just fine. Perhaps a teacher had used it while grading papers? If so, I bet the students loved seeing this smiling face! It would have symbolized good work, I'm sure.
The storage tub also held five stamp pads and nine acrylic blocks, in three different sizes. (if you're not a rubber stamper, these blocks are used with clear stamps, such as the ones I showed off earlier).
And for all this stamping goodness (plus a perfectly good storage tub)? Three bucks!
I bought a few more things at the church rummage sale, some vintage, some not - but all at excellent prices. Needless to say, I was glad I had stopped in before we went on vacation!
.
As a rule, rummage sales don't fail, especially the ones run by churches. Devoted congregants are usually happy to donate their unwanted items, and the results are tables laden with kitchenware, holiday decorations, vintage goodies and more. (there wasn't clothing offered at this particular sale).
I came back from the rummage sale quite pleased with what I'd found. Only bought one kitchen item, but craft supplies and vintage finds (often a combination of both, as you'll soon see) were plentiful.
Show and Tell Time!


So you'd think this Santa scene is meant to be embroidered, yes? No, as a finished corner shows:

The set also came with four 12" napkins:


More vintage:


For a dollar, I got a pile of 1970's to early 1980'd craft leaflets and craft kits, starting with:

Somewhat better is this:


In case you're curious, no, I never learned how to do macrame. However, I've started to see online pics of millennial types who've made macrame projects that look quite nice. I think that typically they've used some sort of natural cotton roping or cording, which gives their wall hangings and pot hangers a pleasing organic look. So who knows, maybe I'll try my hand at a 21st Century version of "Texas Topaz" sometime.
But I'd be more likely to first try some projects from this leaflet, also in the bundle:


For next year's tulip festival:

(Not everything in the bundle is photo-worthy, such as the two drab candlewicking pillow kits. Maybe a clever millennial will revive that craft sometime too!)
Another vintage purchase:

A grouping of six vintage children's clothes hangers. Liked the colors and the animal depictions:

But one of my favorite finds wasn't vintage - rather, it was a shoebox-sized plastic storage tub filled with rubber stamping supplies, some of which had never been used.

Handy words and phrases:


I loved the image in this self-inking stamp, also in the same storage tub:

The storage tub also held five stamp pads and nine acrylic blocks, in three different sizes. (if you're not a rubber stamper, these blocks are used with clear stamps, such as the ones I showed off earlier).
And for all this stamping goodness (plus a perfectly good storage tub)? Three bucks!
I bought a few more things at the church rummage sale, some vintage, some not - but all at excellent prices. Needless to say, I was glad I had stopped in before we went on vacation!
.
Thursday, October 13, 2016
Let's Go East: A Short Trip To PA And NY
Hello! Took a short but sweet trip out east for a long weekend. Williamsport, PA was our base, but we also visited a few other places.
But before we reached Williamsport, we stopped at the nearby Purity Candy Company. I got my obligatory behind-the-scenes pic of chocolate crafting:
 Looks like the folks at Purity are getting ready for Thanksgiving! To the left are a pair of milk chocolate turkeys. They would look pretty good-sized if not for being dwarfed by the dark chocolate mega gobbler to the right. I think he weighs in at five pounds. Every fall we're at Purity, I get a kick out of seeing these big boys.
Penny pinchers' hint: there's a "bargain corner" near the register, with baskets of "seconds" in it. I plucked a bag of milk chocolate-dipped pretzels, while my husband bought a bag of dark chocolates with various fillings, mostly vanilla creams. There's nothing wrong with the taste of these goodies, they are just a bit irregular.
I regret to say I took no other photos around Williamsport - it was chilly and drizzly the day we arrived, and we weren't around much the next day. So I'll have to just describe what we did and saw.
We stayed at the downtown Hampton Inn. From there, we walked to The Stone House for dinner. Had a decent wood-fired oven pizza. After dinner we walked along the Susquehanna River Trail.
The next day posed a bit of a dilemma. I wanted to drive around in the countryside to view the glories of fall color massed on the hillsides and to view the many quaint small towns in the region. My husband wanted to drive up to Ithaca, some two hours to the north. So we compromised: instead of taking the limited access US 15, we drove on some back roads up to Ithaca instead. Somewhat to my husband's surprise, the alternate route didn't take any more time. (and to be fair to US 15, the scenery along that route is really nice too. However, as with any limited access road, you're more removed from the countryside and the towns).
It had turned quite chilly in Ithaca, so it really felt like fall that day! Nevertheless, we had a good time. Ithaca is home to Cornell College, and thus has a freewheeling sort of college town vibe that we like.

 These two photos are from the crazy quilt-like community bulletin board inside the DeWitt Mall, an old school building turned mini mall. The first photo has an ad for hula dance lessons, while the second photo shows info on a soapmaking class. There's a lot going on in Ithaca, it seems.
Alas, it was a Sunday, so some of the shops in the mall were closed for the day. No browsing for antiques at Pastimes and no checking out used books at The Bookery. But the co-op bookstore Buffalo Street Books was open, as was a branch of GreenStar food co-op. And if I'd been hungry, I could have eaten at the nationally-known Moosewood restaurant.
After looking around in DeWitt Mall it was time to head over to Ithaca Commons, a pedestrian shopping area. It was nice to see that the construction that had been going there for seemingly forever (or at least two years) is finally over. No more concrete construction barriers and torn-up sidewalks.
 Ithaca Commons, now open for strolling again. There are a lot of cool businesses located here, ranging from outdoorsy stuff, eco-friendly wares, fair trade, art galleries, restaurants and more. But since I had slept poorly the night before - and since it would be my turn to drive the two-hour return trip to Williamsport - I didn't have a lot of energy to shop. So instead, I happily browsed the big selection of used books at Autumn Leaves, and came out of the store with a couple.
Dinner was close by, at the Bandwagon Brew Pub. My husband always looks forward to the Cajun-influenced shrimp and andouille sausage served over a cornmeal waffle. (I asked them for the recipe but they refused to give it to me). He got some of their brews too. Being the designated driver, I had to settle for some coffee. I enjoyed my burger though.
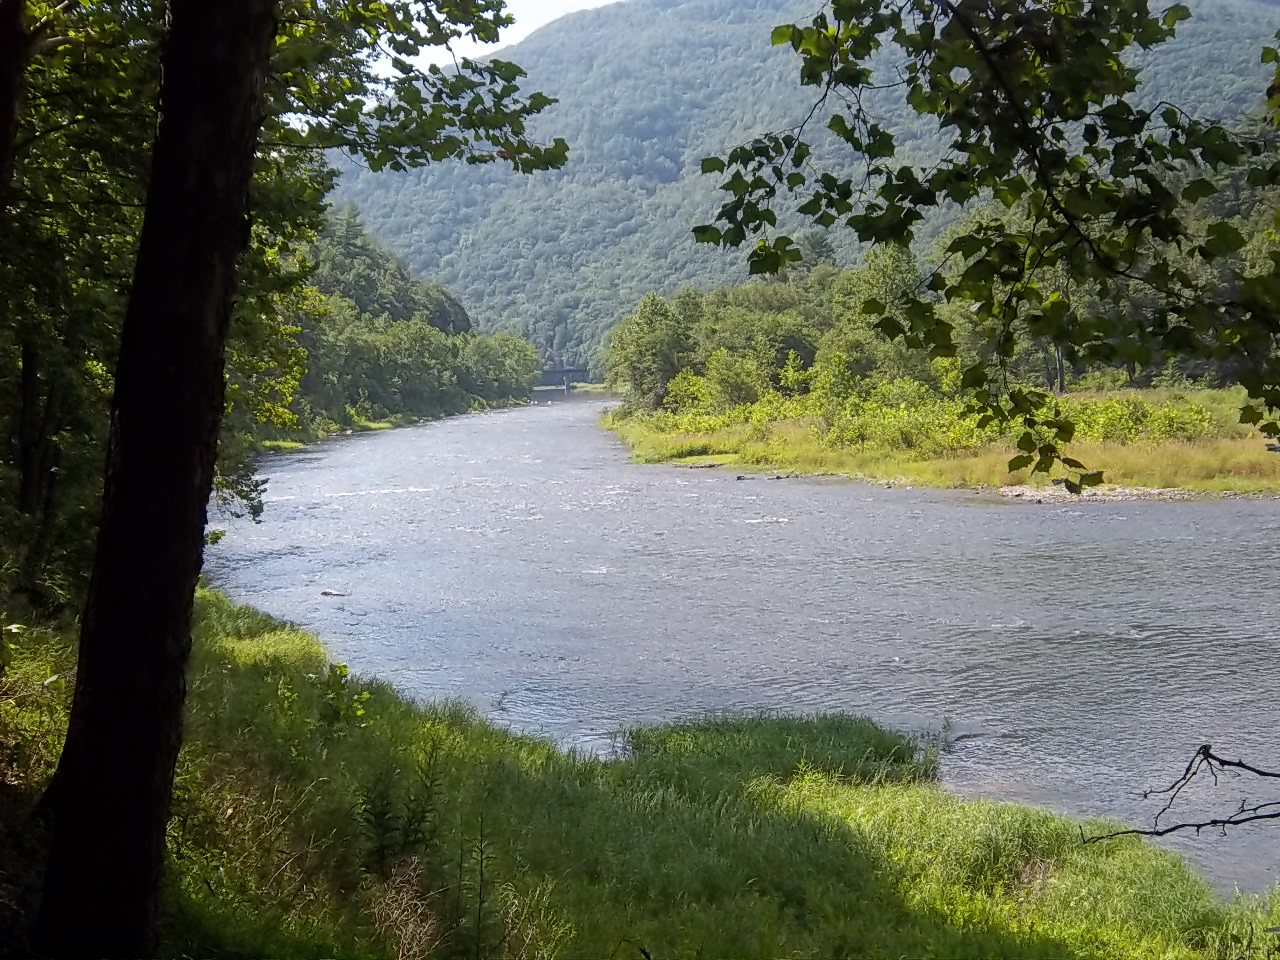
The next day was sunny and pleasant, so we drove up to the Pine Creek Rail Trail and walked around four miles. I neglected to take some photos, thinking I'd already shown off some fall photos in a previous blog post. I couldn't find these, so to refresh your memory I'll show off some pics from a summer visit a few years back. The views hadn't changed, only the fall color is missing!

 Summer or fall, the Pine Creek Rail Trail is always pretty!
From the rail trail, we began the drive west toward home, stopping in DuBois for the night. This was a short trip but we still enjoyed the scenery along the way. Even driving on I-80 is enjoyable in Pennsylvania.
DuBois is a small town of around 8,000 people, and there isn't exactly a lot around it. Therefore, you know a restaurant located there must be notable if it has over 300 reviews on TripAdvisor and over 100 reviews on Yelp. And when all those reviews on both sites average out to 4.5 out of 5 stars, you figure it must be pretty good.
If you're talking about Luigi's in downtown DuBois, you'd be right - those 4.5 ratings are on the money. I'm hard on restaurants, but in three visits thus far to this place, I've been happy. The menu looks amazing, but I've only ever gotten the stromboli. You get your choice of three items for the filling (just like pizza ordering), then patiently wait for the monster to bake. And by monster, I mean that it comes already cut in half. It'd be hard to handle otherwise! One half is more than enough for me. Very good. My husband had pasta with marinara sauce and enjoyed that as well. Luigi's is definitely a must-stop if you ever find yourself near DuBois.
After spending the night in DuBois, it was time to make the long trip back home. There has been frost in DuBois overnight, but it was sunny all the way home, and it was in the 70's as we passed through Ohio and across Michigan. It's always nice to have good driving weather on a long trip!
So yes, it had been a short trip to Pennsylvania and New York, but it had been a good one.
But before we reached Williamsport, we stopped at the nearby Purity Candy Company. I got my obligatory behind-the-scenes pic of chocolate crafting:

Penny pinchers' hint: there's a "bargain corner" near the register, with baskets of "seconds" in it. I plucked a bag of milk chocolate-dipped pretzels, while my husband bought a bag of dark chocolates with various fillings, mostly vanilla creams. There's nothing wrong with the taste of these goodies, they are just a bit irregular.
I regret to say I took no other photos around Williamsport - it was chilly and drizzly the day we arrived, and we weren't around much the next day. So I'll have to just describe what we did and saw.
We stayed at the downtown Hampton Inn. From there, we walked to The Stone House for dinner. Had a decent wood-fired oven pizza. After dinner we walked along the Susquehanna River Trail.
The next day posed a bit of a dilemma. I wanted to drive around in the countryside to view the glories of fall color massed on the hillsides and to view the many quaint small towns in the region. My husband wanted to drive up to Ithaca, some two hours to the north. So we compromised: instead of taking the limited access US 15, we drove on some back roads up to Ithaca instead. Somewhat to my husband's surprise, the alternate route didn't take any more time. (and to be fair to US 15, the scenery along that route is really nice too. However, as with any limited access road, you're more removed from the countryside and the towns).
It had turned quite chilly in Ithaca, so it really felt like fall that day! Nevertheless, we had a good time. Ithaca is home to Cornell College, and thus has a freewheeling sort of college town vibe that we like.


Alas, it was a Sunday, so some of the shops in the mall were closed for the day. No browsing for antiques at Pastimes and no checking out used books at The Bookery. But the co-op bookstore Buffalo Street Books was open, as was a branch of GreenStar food co-op. And if I'd been hungry, I could have eaten at the nationally-known Moosewood restaurant.
After looking around in DeWitt Mall it was time to head over to Ithaca Commons, a pedestrian shopping area. It was nice to see that the construction that had been going there for seemingly forever (or at least two years) is finally over. No more concrete construction barriers and torn-up sidewalks.

Dinner was close by, at the Bandwagon Brew Pub. My husband always looks forward to the Cajun-influenced shrimp and andouille sausage served over a cornmeal waffle. (I asked them for the recipe but they refused to give it to me). He got some of their brews too. Being the designated driver, I had to settle for some coffee. I enjoyed my burger though.
The next day was sunny and pleasant, so we drove up to the Pine Creek Rail Trail and walked around four miles. I neglected to take some photos, thinking I'd already shown off some fall photos in a previous blog post. I couldn't find these, so to refresh your memory I'll show off some pics from a summer visit a few years back. The views hadn't changed, only the fall color is missing!

From the rail trail, we began the drive west toward home, stopping in DuBois for the night. This was a short trip but we still enjoyed the scenery along the way. Even driving on I-80 is enjoyable in Pennsylvania.
DuBois is a small town of around 8,000 people, and there isn't exactly a lot around it. Therefore, you know a restaurant located there must be notable if it has over 300 reviews on TripAdvisor and over 100 reviews on Yelp. And when all those reviews on both sites average out to 4.5 out of 5 stars, you figure it must be pretty good.
If you're talking about Luigi's in downtown DuBois, you'd be right - those 4.5 ratings are on the money. I'm hard on restaurants, but in three visits thus far to this place, I've been happy. The menu looks amazing, but I've only ever gotten the stromboli. You get your choice of three items for the filling (just like pizza ordering), then patiently wait for the monster to bake. And by monster, I mean that it comes already cut in half. It'd be hard to handle otherwise! One half is more than enough for me. Very good. My husband had pasta with marinara sauce and enjoyed that as well. Luigi's is definitely a must-stop if you ever find yourself near DuBois.
After spending the night in DuBois, it was time to make the long trip back home. There has been frost in DuBois overnight, but it was sunny all the way home, and it was in the 70's as we passed through Ohio and across Michigan. It's always nice to have good driving weather on a long trip!
So yes, it had been a short trip to Pennsylvania and New York, but it had been a good one.
Tuesday, October 4, 2016
Get Carded: A Wedding Card
Hello! Attended a niece's wedding over the weekend, and it was a very nice event indeed. The wedding was an outdoor one, at a park literally on an island. We walked across a bridge near the parking lot to reach the island, how cool was that? And while the bridal couple was saying their vows, a pair of blue herons grandly sailed above the gathering. Very nice symbolism, I thought.
The reception was at a country club, a very nice setting as well - quite scenic with the rolling hills of the golf course as a backdrop for the occasion. A good time was had by all!
I labored over my greeting card to the newlyweds and thought it turned out pretty well:
 A close-up:
 Materials used:
Adding the names of the newlyweds made it look like I'd planned to use those gold hearts all along. I was relieved I could salvage the card. Of course, I would have gladly made a new card if I didn't think I could fix the old one.
Congratulations to Marie and Logan!
The reception was at a country club, a very nice setting as well - quite scenic with the rolling hills of the golf course as a backdrop for the occasion. A good time was had by all!
I labored over my greeting card to the newlyweds and thought it turned out pretty well:


- white card stock
- scrap of 1880's ledger paper
- vintage Bridal Bingo card, cut into heart shape and embellished with ivory and gold glitter acrylic paints
- hearts cut from gold art paper scraps
- "marie" and "logan" stamped in blue ink on manila folder scrap
- two ribbons tied together into bow
- vintage button
Adding the names of the newlyweds made it look like I'd planned to use those gold hearts all along. I was relieved I could salvage the card. Of course, I would have gladly made a new card if I didn't think I could fix the old one.
Congratulations to Marie and Logan!
Subscribe to:
Posts (Atom)