Hello! It was chilly and overcast when I got up this morning, a far cry from the summer-like weather we'd had recently. It looked like a comfort-food morning to me, so I decided to try a recipe for a single serving of apple crisp. I would make it less sweet than how the recipe was written, and it would serve as my breakfast. It was so quick to prepare and cook that it was done by the time the coffee was finished brewing!
Microwave Apple Crisp For One(adapted from unknown source; possibly a Taste Of Home magazine)
1 medium apple, peeled and sliced
2 tablespoons brown sugar (see notes after recipe)
2 tablespoons quick-cooking oatmeal
1 tablespoon all-purpose flour (see notes after recipe)
1/8 teaspoon cinnamon
1 tablespoon cold butter or margarine (see notes after recipe)
Place prepared apple in small microwave-safe bowl. In another bowl, combine the dry ingredients; cut in butter until crumbly. Sprinkle over apple. Microwave, uncovered, on high for 2 1/2 minutes or until fruit is tender. (see notes after recipe). Yield: 1 serving. Editor's Note: this recipe was tested in a 700-watt microwave. It can also be baked at 375 for 25-30 minutes.
Notes: I used about half the specified amount of brown sugar, and it was plenty sweet. I used whole wheat flour instead of all-purpose, and used butter.
Small bowls are all you need for this recipe! For cooking, I put the apple/topping mixture in a single-serving casserole dish (I greased the dish first). I mixed the topping in a small cereal bowl, using my fingers to cut in the butter.
Our microwave has 1,200 watts, a far cry from the 700 watt oven used to test the recipe. Instead of guessing as to how much less time I should cook my mini apple crisp for, I found this information on the Internet. Thus, I could determine that I should set the cooking time for 1:28.
And that I did, although I found I still needed a bit more cooking time after that. I was starting with a rather hard apple, so that's probably why I needed an extra 20 seconds.
Here's how my apple crisp for one turned out:
I wouldn't eat something like this for breakfast all the time, but it was perfect for today's weather! Slightly sweet even with the reduced amount of brown sugar, but still very good.
Hello! A nasty head cold has left me rather listless this past week. Nevertheless, since fall was ushered in this week, I decided to take a few photos of the beginning of the season.
Above, a greeting card featuring a photo from Vickie McCall Carpenter. Knowing my love of squirrels, a friend visiting Asheville, North Carolina last fall brought the card back as a gift to me. White squirrels are found in the nearby town of Brevard, where a festival in their honor occurs every year. I hadn't heard of them before receiving this card, and now I'll happily display it every fall.
My fall weathergram. Information on this seasonal project can be found here.
In spite of fall's arrival a few days ago, the weekend had summer-like temperatures. This was good for my vegetable garden, which is mostly still hanging in there:
The tomato variety seen above is called Stupice and does well in cooler weather. I never know what kind of summer weather we're going to have, so I like to hedge my bets by growing some Stupices in case we're short on heat waves. It was a relatively hot summer this year but this variety didn't seem to mind. And even though it's beginning to get cooler, my Stupice plants are still going strong.
This is a smaller-sized tomato, 4 ounces or less. Still, I had enough of them to make pasta sauce the other day.
Above, a Leutschauer Paprika pepper. I've never been all that fond of the powdered paprika sold in stores; too often it seems to be more about adding color to a dish than adding any flavor. Not a problem with home-grown paprika peppers! Picked when red, then dried in my food dehydrator, I'll then have them on hand to grind fresh as needed. Chicken Paprikash never had it so good!
(Paprika seeds can be hard to find. I found my variety here.)
Lots of sedum in our yard:
I don't know what variety this is, as it had been planted by a previous owner. (It might very well be 'Autumn Joy'). I keep dividing that original planting; by now I have six clumps in various parts around the yard, including the above location next to the garage. It has done so well no matter where I've stuck it that most of the clumps could use some more dividing!
Not from my yard, but still an important part of fall:
Above, an Empire apple from the local farmer's market. I ate this one for lunch, and also have plans for apple crisp as well with some of the other Empires.
That's actually one of my favorite things about this time of year - baking with seasonal fruits like apples and pumpkins. Summer is my favorite season, but fall does have its charms as well. And anyway, since fall is here, might as well enjoy it!
Hello! I've never used aluminum foil for anything but lining a baking dish or wrapping up some leftover. Silly me, limiting my usage of this material to kitchen tasks! But that was before I found this at a used book sale:
Alcoa's Book Of Decorations, authored by Conny von Hagen. The book was published in 1959.
The front cover subtitle is A year-round Treasury of Easy-to-do Decorations for Holidays and Special Occasions. So let's see what decorations Ms. von Hagen had whipped up for this book! I'm warning you, you're in for a real "treat"!
Christmas stockings, made from double layers of heavy-duty foil and decorated with various trims. How unfortunate I've been over the years, to have had to make do with stockings made from fabric instead!
The Three Wise Men, although in my opinion they don't look especially wise here. Foil has been used to form hair, turban, pants and more. The camel in the background is shaped from foil too, of course.
Okay, this idea wasn't too bad: for a children's party, a train was made from large boxes (the opposite page showed two more train "cars"). The boxes were covered in foil and the wheels were made of foil pie plates. Like I'd said, not too bad, but covering large boxes with aluminum foil sounds rather time-consuming - not to mention the expense involved!
But of course von Hagen had no qualms about using foil in every decoration imaginable; the projects go on and on. This post only discusses a fraction of the author's foil-induced imagination.
Can you guess what holiday the above creation is in honor of? Perhaps a close-up will help you figure it out:
Did you guess Father's Day? If you did, you'd be right. This number is supposed to be a king, constructed of a broom, foil arms and colored foil crown and ears. The nose is made from a red rubber ball - I'm surprised it wasn't covered in foil too! Dad's presents - in the form of a tie, pipe, socks and slippers - are shown as part of the figure. "Gift scarf or sports shirt could be draped over the outstretched arm" von Hagen helpfully adds.
Sigh - and here I thought the broom was part of the gift too, so Dad could help keep the house clean! But no such luck.
But before men could become dads, at least some of them got married first, which meant bridal showers for the women they were marrying:
A "bride" has a body made from a mop that's been wrapped and shaped with - you guessed it - aluminum foil (the mop-head forms the "hair" that you see on top). Net material was used to create the veil and dress. Not sure why red netting was used to make the dress though; you'd think white would have made more sense.
The "bride" is stuck into a wastebasket, so at least the actual bride-to-be gained that and a mop at her shower. But she had to suffer through this monstrosity as a centerpiece! Not sure it was worth it.
And of course, if you stay married long enough, you get to celebrate your 25th wedding anniversary! It's a milestone occasion to be sure, so do it up in style with aluminum foil! A "tree" centerpiece made of crushed foil rings, a place marker of two more crushed foil ring - doesn't this decor just ooze romance and happiness? No? Well, how about that snazzy number 25 -it's made from painted crushed foil. How clever is that? (not)
It's not too early to start planning those Halloween costumes! So take a cue from Conny von Hagen and make those masks. To do so, all you have to do is shape eight 3-foot lengths of aluminum foil over very large balloons, then pop the balloons. Eyes and mouths are cut out, ears and noses are shaped from more foil, and red ribbon is glued on to make hair. Colored plastic tape or fabric is used to accentuate the areas around the eyes and mouth.
In case you had to know, the figure on the left is called "Stoopy" and he's described as being wistful looking. Oh really? I can think of another word to describe that mask - it also begins with the letter "w" and is spelled w-e-i-r-d.
The figure on the right is supposed to be a clown.
Would you rather go as a rabbit? If so, just follow the directions I gave above, only make long skinny ears, use green ribbon for hair (I didn't realize rabbits had any green on them, other than the times they get into vegetable gardens). Make a pointy nose. And for Heaven's sake, don't carry around a bunch of carrots - what a cliche! You're much better off clutching a bunch of Indian corn!
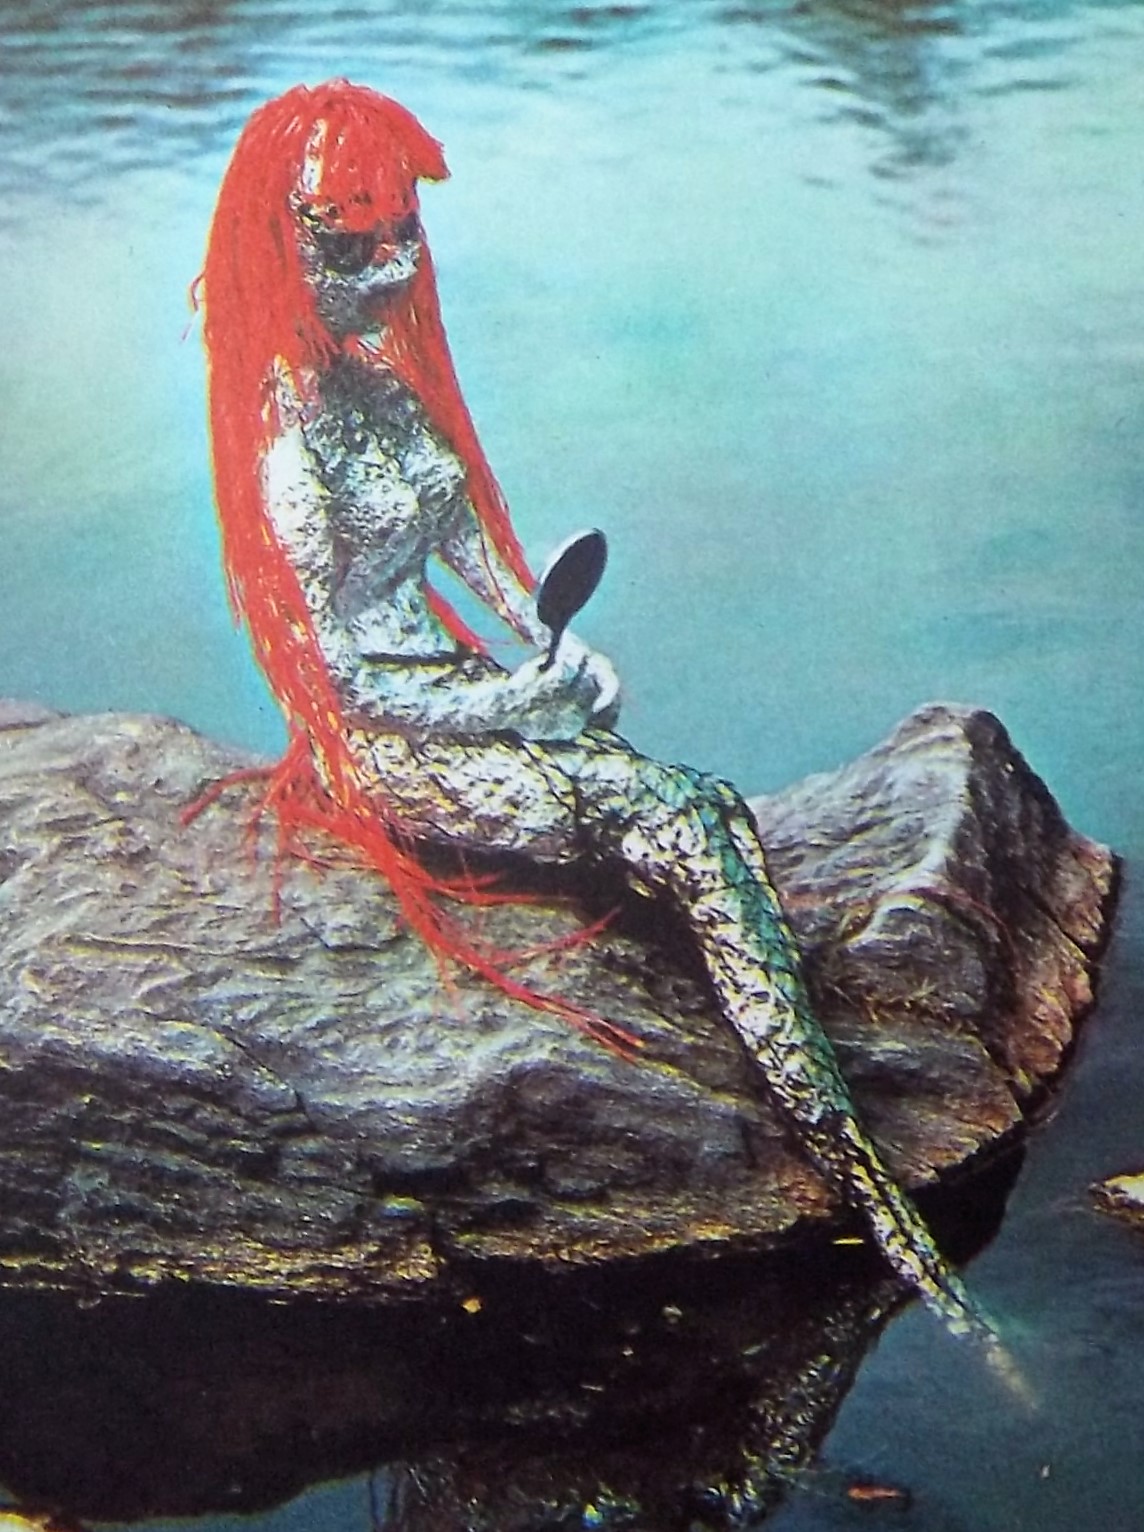
The above photo is from the end of the book. Just in case you think you haven't used enough foil, this mermaid was fashioned for a party with an Under-the-Sea theme (from the way the author described it, it sounded like the party actually happened, in New Orleans). Chicken wire was shaped to form the mermaid body, with lots of lovely foil for covering it. The red "hair" is raffia.
But that's not all! An underwater grotto, rocks, and various sea creatures were constructed the same way. I wondered what the foil-covered octopus mentioned in the write-up looked like, but alas, there's no photo of it in the book.
For scale reference, though, there is a photo of a man hanging up several clusters of foil-covered fish shapes. I didn't reproduce that photo here because the picture quality wasn't very good, but the smallest of the "fish" are about as big as his head - and the biggest fish are even larger than his head.
So once again, large amounts of aluminum foil were necessary. But not to worry, Alcoa had peoples' interests in mind. At the very end of the book is this tidbit: "For further information on use of foil for dance or large party decorations, plus special large quantity packages of Alcoa Wrap, write to..." followed by the address for its Pittsburgh headquarters.
Nowadays, of course, one could just go to the local warehouse club store and get large boxes of aluminum foil there. And you'd better head there soon - Halloween will be here before you know it, so you have to get started on those masks!
Hello! In my last post, I talked about red bell peppers. Well, I'm still seeing red, but this time it's tomatoes.
It's tomato time at our local farmer's market. It's easy to snare some good deals on them this time of year - especially if you go for the baskets or boxes labeled "seconds". These are less-than-perfect specimens, so they're dirt-cheap by comparison to pristine tomatoes.
I bought some "seconds" to try out in a recipe called "Oven-Dried Tomatoes". This recipe was included in Barbara Pleasant's article "Freezing Fruits And Vegetables From Your Garden", Mother Earth News, August/September 2013.
First, the directions, then my notes afterward:
Oven-Dried Tomatoes (adapted from Barbara Pleasant's recipe of the same name)
Preheat your oven to 250. Wash, dry and core ripe tomatoes. Cut paste tomatoes and cherry tomatoes lengthwise in half. Cut slicing tomatoes into quarters. Arrange the tomatoes, cut side up, on baking sheets that have rims to catch any juices. Sprinkle with sea salt; you can also add fresh herbs and a light drizzle of olive oil. Place in oven and cook 1 hour, then reduce heat to its lowest setting. Dry for two more hours, or until the tomatoes flatten and edges pucker.
Freeze your half-dried tomatoes on cookie sheets, then pack them into freezer-safe containers.
Notes: Besides the sea salt and olive oil, I also added a bit of freshly-ground black pepper and sprinklings of Italian seasoning and Aleppo pepper. I used slicing tomatoes.
I followed the oven temperatures and times specified in the recipe - and got tomatoes that barely looked reduced in size. Thus, I had to leave them in the oven longer. We had a lot of rain in August, so I suspect that had something to do with tomatoes that needed more drying time. In other words, I'd started out with very juicy tomatoes.
For subsequent batches, I started at 275, then lowered the heat to 200. It still took awhile for my tomatoes to shrink down, but it was quicker than it would have been if I'd stuck to the original directions.
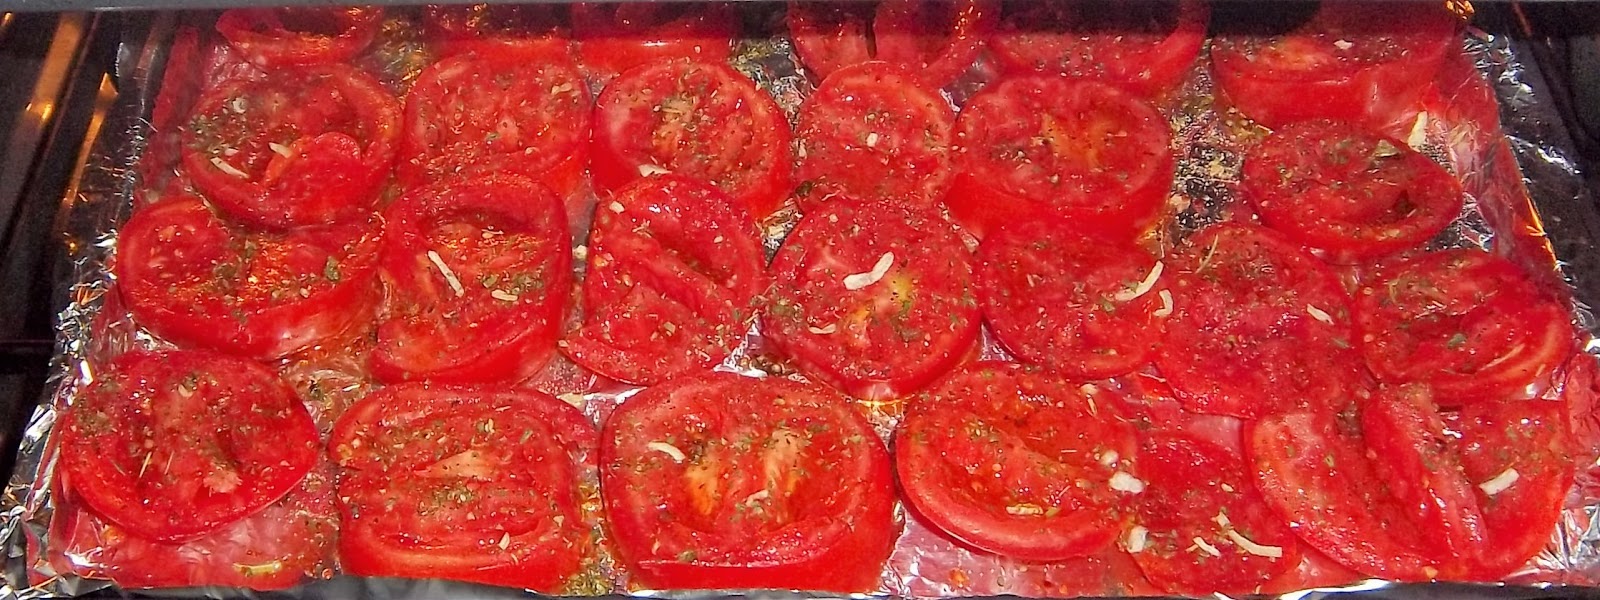
The article had no pictures accompanying the recipe, so I wasn't exactly sure what flattened tomatoes with puckered edges should look like. But I'll show a before and after so you can see how my oven-dried tomatoes turned out:
Above, sliced, seasoned tomatoes are going into the oven.
And above, after oven-drying.
I froze the cooked slices on cookie sheets, then packed them into freezer bags.
Author Pleasant suggested using these for pizza or pasta sauce. I'll try that, but I also thought these would be good on sandwiches and in salads over the winter. After all, as good as local tomatoes are, the decidedly non-local winter tomatoes are as bad. It'll be nice to bypass those mealy, tasteless numbers!
Hello! I like roasted red bell peppers, but I don't like their prices at the grocery stores. So instead I take advantage of the local farmer's market and the current cheapness of fresh red bell peppers there. I buy a big bagful of them and roast my own.
There are a number of directions out there for roasted red bell peppers; over the years I've combined a few instructions to come up with an easy method:
Roasted Red Bell Peppers
1. Preheat broiler and line a broiler pan (I use an old cookie sheet instead).
2. Cut pepper in half vertically and remove the stem, seeds and white pith. Press down on each half with the palm of your hand to flatten it. The flattening creates a more even surface, which results in more skin blackening. The peppers will likely split when you press down on them, so avoid this step if you want perfect halves.
3. Broil until skins are black. This takes eight minutes under my broiler, and I turn the cookie sheet around halfway through for more even blackening.
4. Remove peppers from oven and place in container with lid. Cover with lid, then set aside to cool. Letting the peppers sit in a covered container helps loosen up the skins, and of course they're easier to handle when cooled.
5. The job of peeling the peppers is a bit messy, but if the skins are pretty well-blackened, it goes fairly quickly. I've peeled big bowlfuls of them while watching TV.
6. The peppers exude juices once they're roasted and cooled. So, after the peeling step I like to let them drain in a colander before proceeding further. This probably isn't as critical if you're going to use them right away. But if you decide to roast some to store in the freezer, I think this step helps reduce the peppers' wateriness when thawed.
7. My freezer storage method: I toss the drained, roasted peppers with a little olive oil, then portion them out into 5 ounce amounts. (Why five ounces? To be honest, I don't remember anymore, but it seems to be a size that works well for my small family. You can freeze any package size you want!) Each portion is packed in plastic wrap, then the packages are placed on a cookie sheet and popped into the freezer. Once they're frozen solid, the packages are then stashed in freezer bags and returned to the freezer. They'll keep several months that way.
Here's the bowlful I did earlier today:
Above, three batches of peppers have been roasted.
Peeled and drained:
They look much nicer now, don't they?
And how do I use all these roasted bell peppers? Here's just a few ways:
- in sandwiches
- pizza topping
- mix with some chopped fresh garlic and Italian-style dressing for a salad (always part of my husband's birthday dinner)
- minced, in homemade breads
- sautee onions and garlic in olive oil, then add some chopped peppers and sautee some more. Toss with cooked pasta for a fast entree.
- I don't like the taste of cooked green pepper, which happens to be an ingredients in many recipes. I'll sub in some of my roasted red bell peppers instead. They don't taste the same as cooked green peppers, of course, but they add a nice flavor all their own. They look colorful in a dish too!
I've just listed some basic, no-recipe-required uses, but of course there's lots of recipes that specifically call for roasted red bell peppers. Perhaps you'd shied away from making these recipes because, like me, you didn't want to pay for those little jars at the grocery store.
Well, now you don't have to. Take advantage of those cheap farmer's market prices if red bell peppers are in season where you live and make your own!