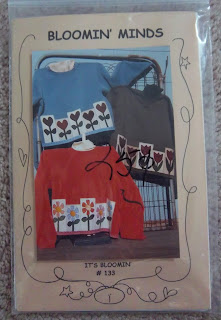
A trio of floral designs for sweatshirt applique. The tulip pattern is on the right. This "It's Bloomin'" pattern (#133) is from the Bloomin' Minds company out of Iowa. Would have cost me $7.50 from their website, but I paid a quarter for it. The original purchaser had selected this pattern from The Pattern Hutch in Pigeon Forge, TN.
This time of year, it took some doing to find a plain sweatshirt at the thrift stores - the few I came across were either zip-up or had designs on the front. But finally I found what I wanted, in a pretty sky-blue color to boot. I thought that would look especially nice for springtime.
The applique is worked by cutting the pattern pieces from fabrics, then affixing the fabric pieces to each other with fusible interfacing. The five panels that result are fused onto the sweatshirt, and lastly, the edges of all fabric pieces are finished off with blanket stitching.
It took a little time to pick out the fabrics I wanted to use for the petals, leaves and background, but finally I was pleased with my choices. So I grabbed my fusible interfacing and ironed away.
And that's where my crafting failure was! Not thinking, I grabbed a type of fusible interfacing that was too heavy for this project once all the layers of fabrics were fused together. When it came time for blanket stitching, I could only get my needle in the outer edges of the whole design. And as far as putting the sweatshirt on my body - well, I tried that to see how it would hang. Of course, the stiffness of the appliqued panel resulted in that part of the sweatshirt not draping well at all. Definitely not the look I wanted!
So, a waste of nice color-coordinating fabrics, a pretty sweatshirt color and my time? It would appear so, but then it hit me: I could use the stiffness of that appliqued panel to my advantage and turn it into a Tulip Festival wall hanging! All I had to do was cut out the panel and sew a backing onto it.
Decided to make things easy by using the sweatshirt for the backing. I just cut off the panel and the back of the sweatshirt together, then blanket-stitched the edges closed. I left a small part near the top of the short sides unstitched. I slit those parts open, slid a dowel through, adding a matching cord, and voila: my wall hanging was done.
Here's out it turned out:
And a close-up:


I love how it turned out! Way to save a project! I love the fabrics you selected too.
ReplyDeleteThanks! Not sure, but some of the fabrics may have come from a de-stashing box of fabrics you once gave me.
ReplyDelete